How to Reduce Background Noise in Recordings
The Five Noise Sources in Every Home Recording
Background noise in home recordings comes from five sources, and each requires a different fix. Throwing money at the wrong solution — buying a new microphone when the problem is room echo, or installing acoustic panels when the problem is keyboard vibration — wastes budget and leaves you frustrated with results that should have been simple to achieve.
We have analyzed thousands of user reviews across our microphone catalog. The noise complaints cluster predictably around these five sources, in order of how frequently they appear.
Hard walls, bare floors, and flat ceilings reflect sound back into the mic. The result is a hollow, echoey recording that sounds like you are in a bathroom. This is the #1 complaint in condenser mic reviews.
Fix: soft surfaces (blankets, rugs, curtains) + closer mic positionAir conditioning, heating systems, computer fans, and standing fans produce constant low-frequency hum. Steady-state noise like this is the easiest for software to remove, but better to prevent it by switching to a dynamic mic that rejects it acoustically.
Fix: dynamic mic + high-pass filter at 80 HzMechanical keyboards are the nemesis of every gaming streamer. The transient clicks are sharp enough to cut through noise gates and too similar in frequency to voice for software to remove cleanly.
Fix: boom arm positioning + dynamic cardioid micTyping, mouse movement, and accidentally bumping the desk transmits vibration directly through the mic stand and into the capsule. This bypasses the polar pattern entirely — it is mechanical vibration, not airborne sound.
Fix: boom arm (decouples mic from desk) + shock mountTraffic, construction, neighbors, dogs barking, sirens. These are the hardest to control because they come through walls and windows. No microphone fixes this — you need physical isolation (closed windows, heavy curtains) or recording during quieter hours.
Fix: closed windows + heavy curtains + schedule around noiseTechnique Fixes That Cost Nothing
Before spending money on gear or software, try these three adjustments. They are free, immediate, and fix most noise problems in most home setups.
Move the mic closer
The inverse square law means doubling your distance from the mic cuts your voice level by 6 dB while the room noise stays the same. Going from 12 inches to 4 inches from your mic is the single highest-impact noise reduction technique. It improves signal-to-noise ratio by 10-15 dB — more than most paid noise reduction software achieves at maximum settings.
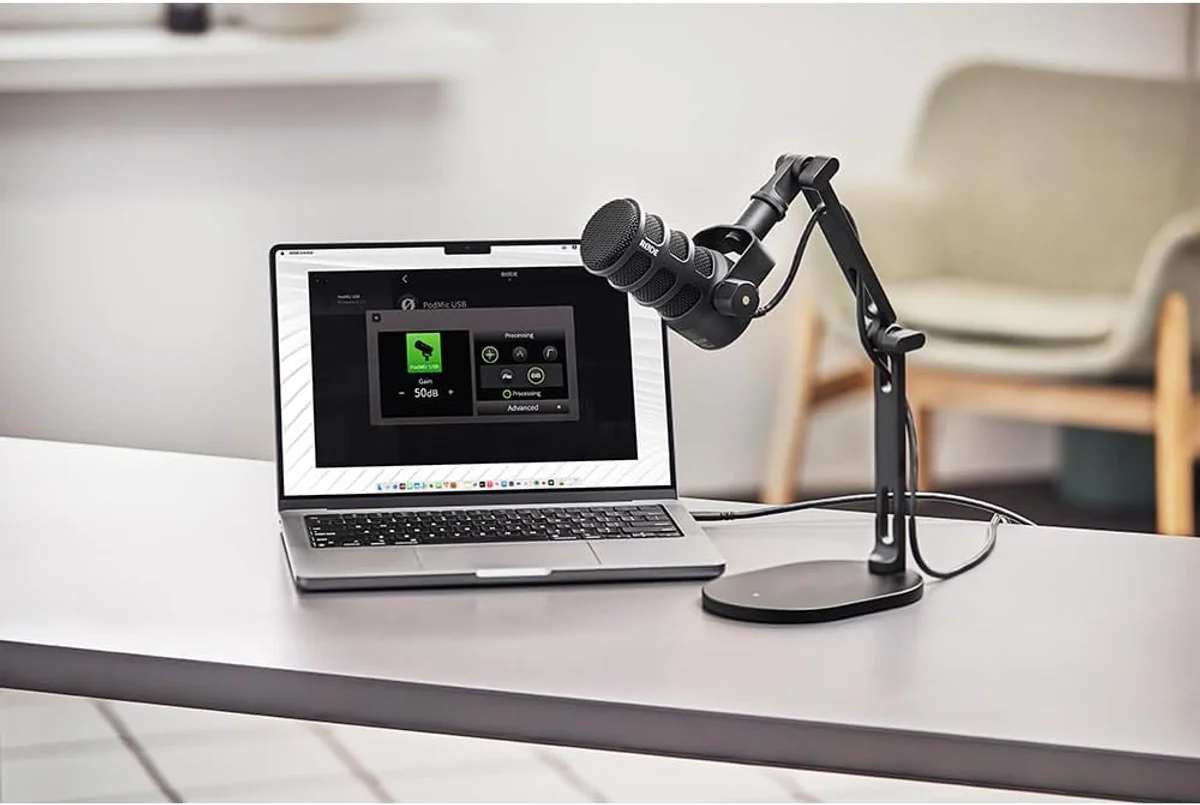
Use a pop filter at close range. Plosive sounds (hard P and B consonants) create blasts of air that cause low-frequency thumps in close-mic recordings. A $10 pop filter or the built-in pop filter on the Rode PodMic USB broadcast microphone solves this completely.
Angle the mic away from noise
Cardioid microphones reject sound from behind the capsule. Point the back of the mic toward your loudest noise source — usually your keyboard, computer, or the window behind your monitor. A boom arm makes this positioning easy and repeatable. Without one, the mic sits on the desk facing upward, with the keyboard directly in the pickup zone.
Close doors and windows
Obvious but frequently ignored. A closed door reduces external noise by 15-20 dB. A closed window with curtains adds another 10 dB. These two actions — taking 5 seconds each — remove more noise than any microphone upgrade or software plugin. We see this pattern constantly in user reviews: "terrible audio quality" from creators recording next to an open window. The mic is not the problem.
Gear Upgrades That Actually Help
After technique fixes, these gear investments produce the biggest noise reduction per dollar spent, ranked by impact.
Decouples the mic from your desk (eliminating vibration noise), positions it between your mouth and noise sources, and frees up desk space. The single best audio accessory for any microphone under the premium tier. Transforms the noise rejection of the TONOR TC30 starter kit and FIFINE AmpliGame budget dynamic from mediocre to good.
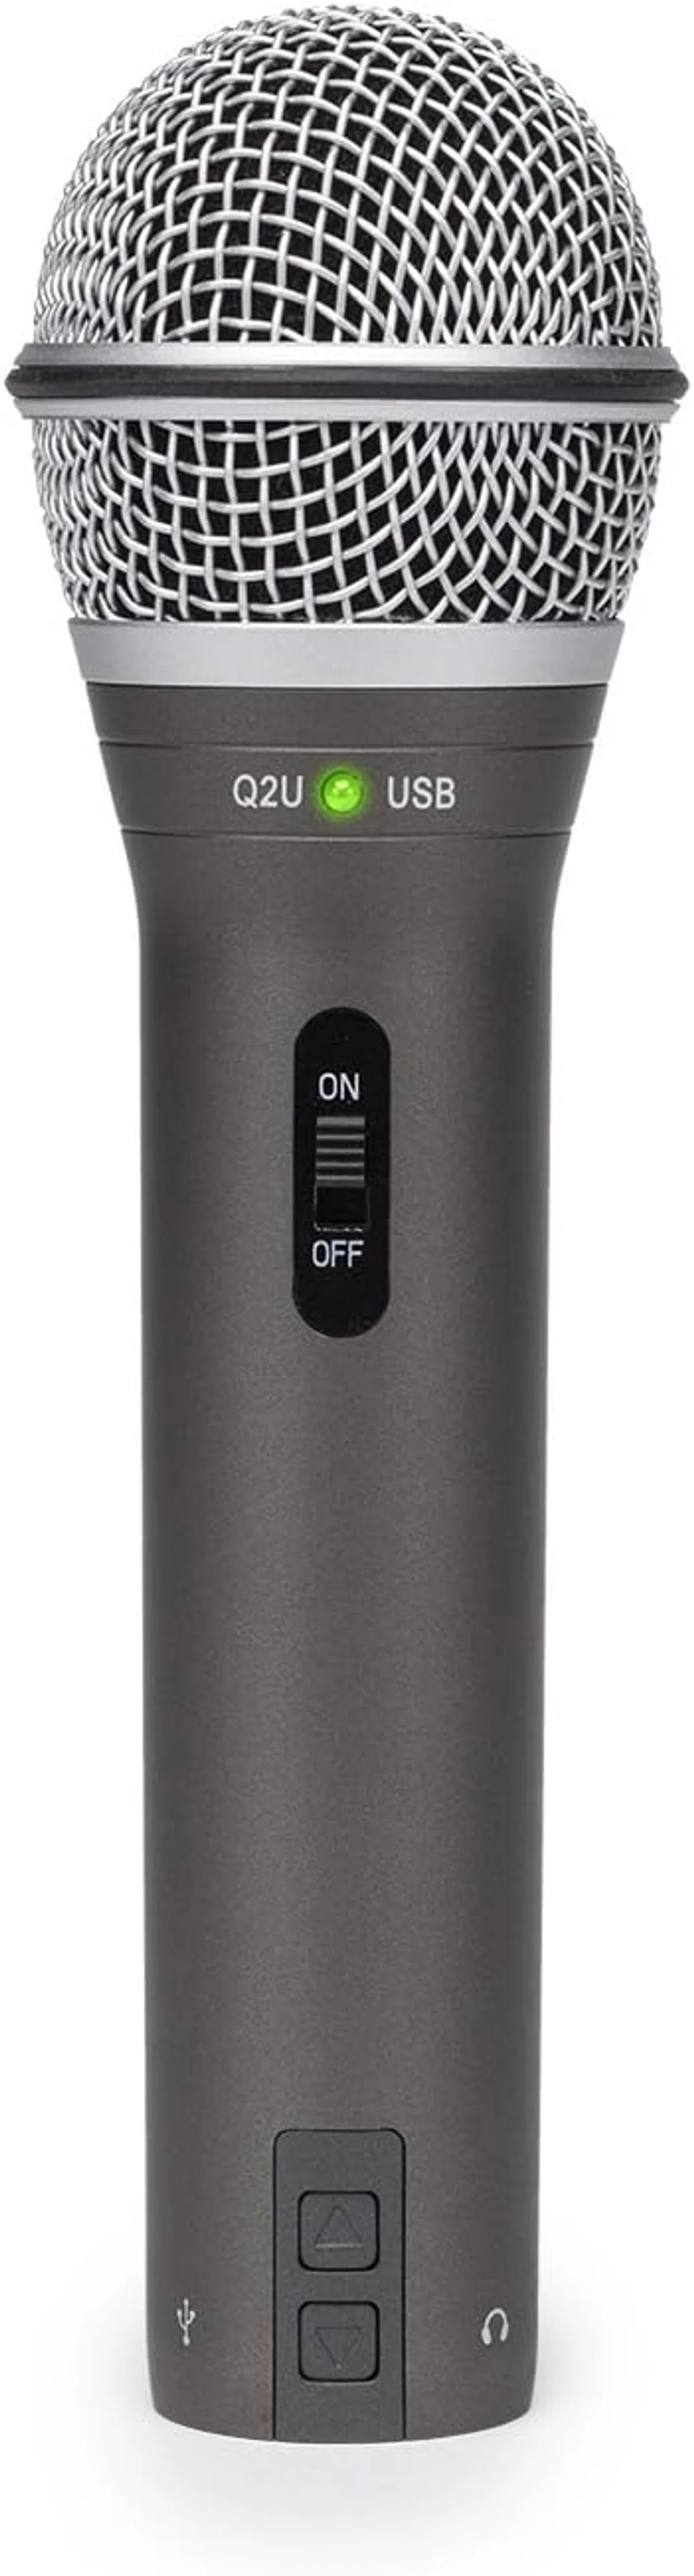
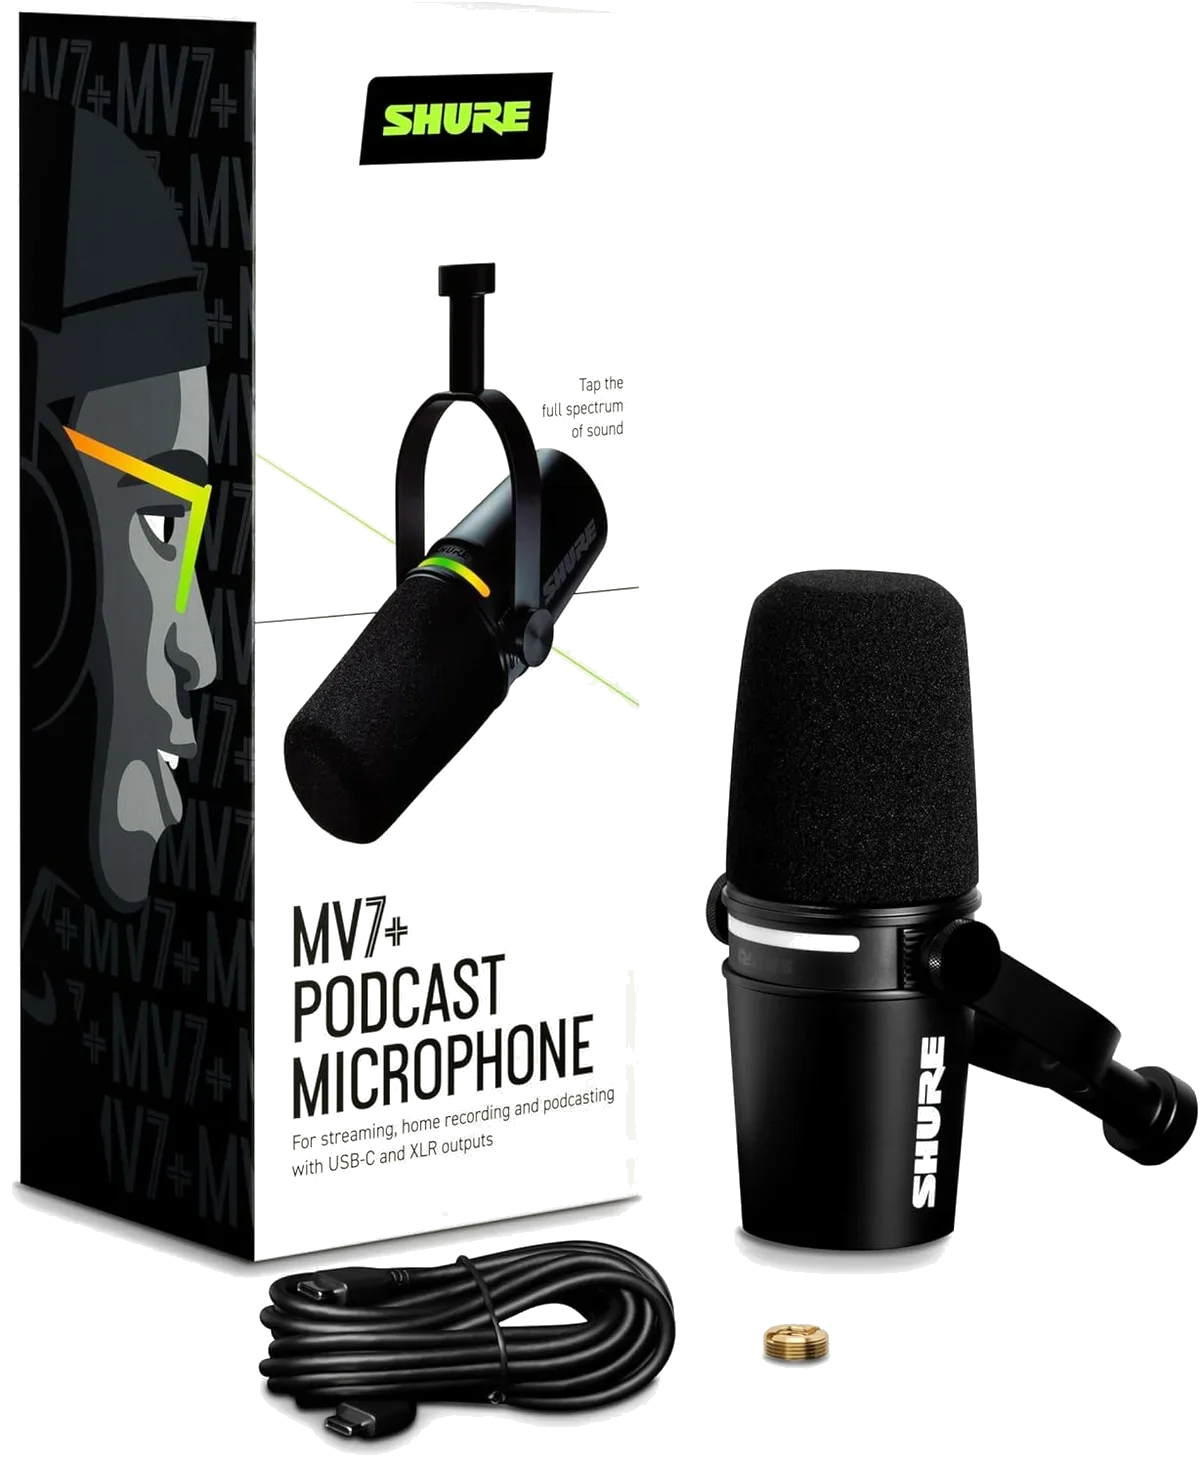
Switching from a condenser to a dynamic mic reduces ambient noise pickup by 10-15 dB without any other changes. The Samson Q2U dual-connectivity microphone ($50–$100) is the budget standard. The Shure MV7+ podcast microphone ($250–$500) adds auto-level DSP that further manages noise in real time.
A thick rug on a hard floor, curtains on windows, and a blanket behind your monitor absorb high-frequency reflections that cause room echo. Not as effective as dedicated acoustic panels, but 80% of the benefit at 20% of the cost. The minimum viable room treatment.
Room Treatment on a Budget
Dedicated acoustic panels cost $50-100 per panel, and a typical home studio needs 6-12 panels for adequate coverage. That is $300-1,200 for a problem that thick blankets, heavy curtains, and a rug solve at a fraction of the cost.
The physics are simple: sound reflects off hard, flat surfaces and is absorbed by soft, thick materials. The more soft surface area in your recording space, the fewer reflections reach your microphone. You do not need studio-grade acoustic foam. You need mass and softness.
Hang a thick blanket or moving pad on the wall you face while recording. Your voice hits this surface first after passing the mic. Absorbing it here prevents the strongest first reflection from entering the recording. This single treatment produces the most audible improvement of any room change.
A thick rug or carpet under your desk and chair absorbs reflections between the floor and the desk surface. Hard floors are the second-worst reflective surface in most home offices after bare walls. Even a cheap bath mat makes a noticeable difference on a hard floor.
Heavy curtains serve double duty: they absorb high-frequency reflections and block external noise from traffic and weather. Blackout curtains are often thick enough to provide measurable acoustic benefit. Keep them closed while recording.
If space allows, a bookshelf filled with books behind your recording position breaks up reflections that would otherwise bounce between the wall behind you and the wall behind your monitor. Irregular surfaces scatter sound instead of reflecting it — bookshelves, clothing racks, and storage shelves all work.
Microphone-Specific Noise Reduction Features
Some microphones include built-in noise management features. Knowing which mics have what saves you from buying external solutions that duplicate what the mic already does.
The Shure MV7+ podcast microphone includes a real-time denoiser in its DSP processing chain. It targets steady-state noise like fan hum and HVAC without processing transients or voice. At moderate settings, it is transparent — most listeners cannot tell it is active. This is hardware noise reduction that operates before the audio reaches your recording software, which means it stacks with any software processing you add later.
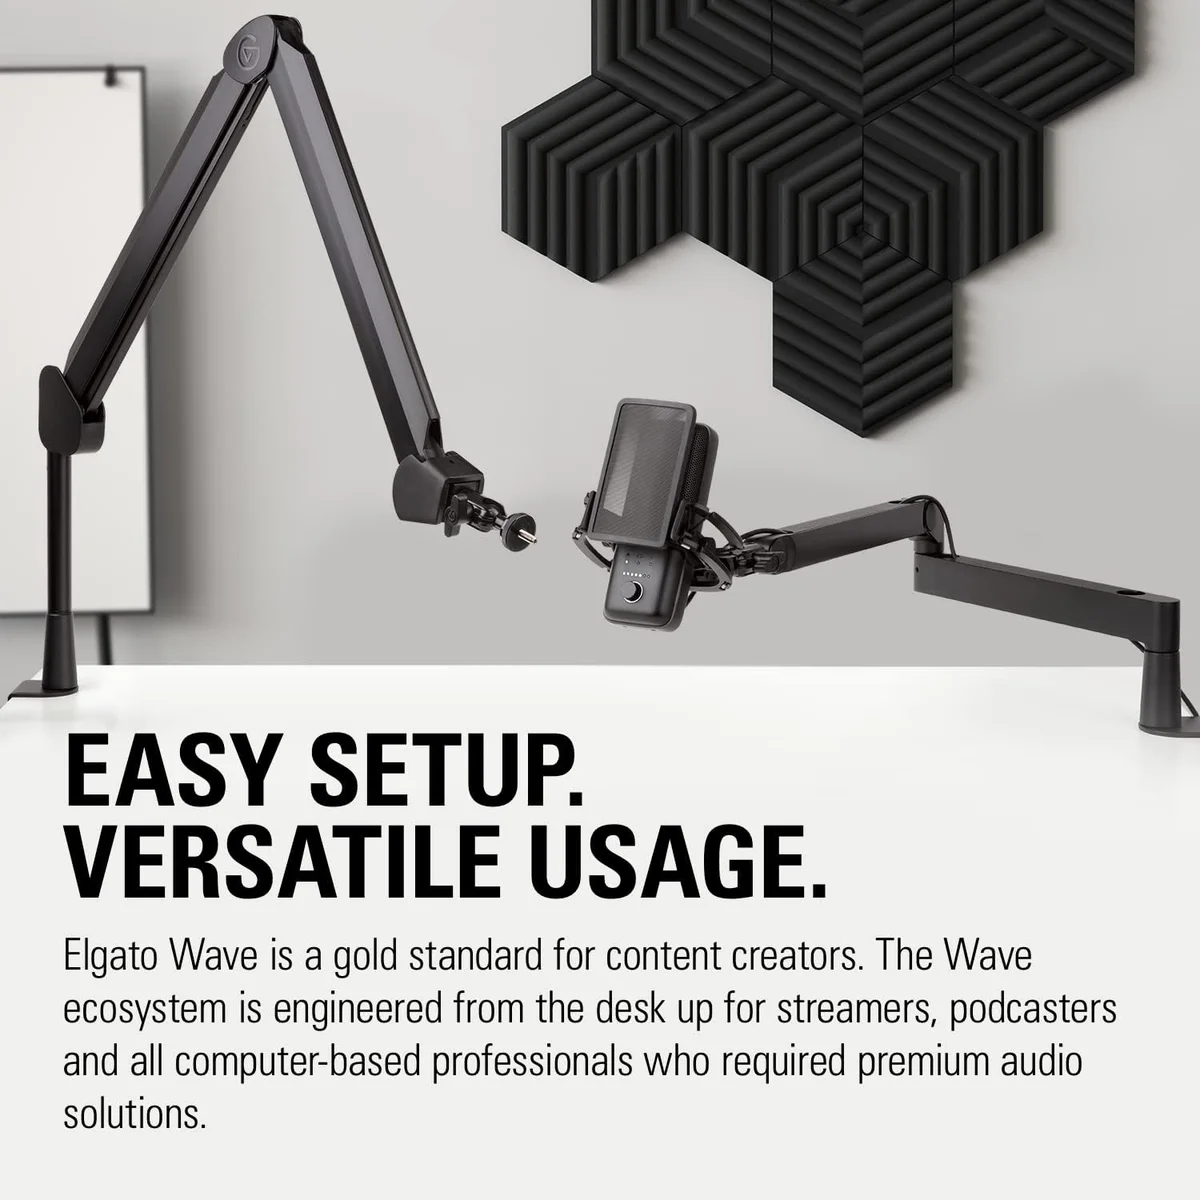
The Elgato Wave:3 streaming microphone takes a different approach with Clipguard — not noise reduction, but peak management. It runs a parallel low-gain recording that activates when sudden loud sounds would otherwise clip. For streamers, this prevents the worst "noise" in their recordings: distorted audio from shouts and table impacts.
The Rode PodMic USB broadcast microphone has no software features at all — its noise reduction is purely acoustic. An internal pop filter handles plosives. The dynamic cardioid capsule rejects off-axis noise by design. And the broadcast-style end-address form factor naturally positions the mic close to your mouth when mounted on a boom arm. Sometimes the best noise reduction is good mechanical design.
Software Noise Reduction: When and How
Software should be your last step — the polish after technique, gear, and room treatment have done the heavy lifting. If you need aggressive software noise reduction to get acceptable audio, go back to the sections above. Something is wrong upstream.
Light software noise reduction — just enough to clean up residual fan hum or a faint street sound — works well and preserves voice quality. Aggressive settings produce hollow, robotic audio that sounds worse than the original noise in many cases.
Use the RNNoise filter (labeled "Noise Suppression" in OBS) at default settings. It handles fan hum and mild room noise without audible voice degradation. Avoid the older Speex-based filter — RNNoise is noticeably better.
Enable Krisp noise suppression in voice settings. It is aggressive but effective — designed for environments with keyboards, game audio, and household noise. Not ideal for music or ASMR where non-voice sounds are intentional.
Adobe Podcast (free, AI-powered), Audacity with Noise Reduction plugin, or iZotope RX. Capture a "noise print" during silence, then apply noise reduction at -6 to -12 dB. Lighter settings preserve more voice texture.
The Honest Priority Order
Look, we have read every noise-related review across 22 microphones. The pattern is clear.
Technique beats gear. Gear beats software. Room treatment beats all three. And the order you address them matters more than how much you spend on any single step.
A $60 dynamic mic on a $25 boom arm, 4 inches from your mouth, in a room with curtains and a rug, produces cleaner audio than a $250 condenser mic on a desk stand, 12 inches away, in a bare room, running $200 of noise reduction software. The first setup costs $85 total. The second costs $450 and sounds worse.
Start cheap. Fix technique first. Upgrade only when you have identified the specific noise source that technique cannot address. That approach produces the best results per dollar spent — and it is the approach every successful creator in our data followed, whether they realized it or not.
One more point worth repeating: condenser microphones are not broken when they pick up background noise. They are doing exactly what they were designed to do — capturing every sound in the room with high sensitivity and wide frequency response. In a treated studio, that sensitivity is a feature. In an untreated bedroom, it is a liability. If your room is noisy and you are not willing to treat it, a dynamic microphone is the correct tool. The Samson Q2U at its price point, the Rode PodMic USB for broadcast quality, and the Shure MV7+ for the best-in-class experience are all dynamic mics designed for exactly this scenario. They are not downgrades from condensers — they are the right tool for untreated rooms, which is where most content creators record.

Frequently Asked Questions
What is the cheapest way to reduce background noise?
Move your microphone closer to your mouth. Going from 12 inches to 4 inches improves your signal-to-noise ratio by 10-15 dB — more than most paid software can achieve. Combined with a dynamic mic (the Samson Q2U starts under $70), this is the highest-impact, lowest-cost improvement available.
Does a boom arm reduce noise?
Yes, in two ways. First, it decouples the mic from your desk, eliminating vibration noise from typing, mouse clicks, and desk bumps. Second, it positions the mic between your mouth and the wall behind your monitor, pointing the cardioid rejection zone toward your keyboard and computer. A $25 boom arm produces a bigger noise reduction than a $100 software plugin.
Can acoustic panels fix a noisy room?
Acoustic panels reduce echo and reverb (reflected sound bouncing off walls). They do not block external noise like traffic, neighbors, or HVAC. If your noise is room echo, panels help. If your noise comes through windows and walls, panels do nothing. For home studios, thick curtains, rugs, and blankets provide 80% of the benefit at 20% of the cost of dedicated panels.
Should content creators use noise gates?
For gaming and streaming, a light noise gate works well — it silences the mic between sentences, removing keyboard noise and room hum during pauses. For podcasting and voiceover, gates can sound unnatural because they cut off quiet words and breaths. Use a gate for real-time content and a noise reduction plugin for edited content.
Is a dynamic mic better than a condenser for noisy rooms?
Yes. Dynamic mics have lower sensitivity and naturally reject ambient noise. In user reviews across our catalog, noise complaints on dynamic mics like the Rode PodMic USB and Samson Q2U run at roughly one-third the rate of noise complaints on condenser mics like the Blue Yeti and HyperX QuadCast S. The physics favor dynamics in untreated rooms.
Why does my mic pick up my mechanical keyboard?
Two factors: mic sensitivity (condensers pick up more) and mic position (if the keyboard is between you and the mic, it is in the pickup zone). Fix both: use a dynamic mic on a boom arm positioned above and in front of your mouth, angled away from the keyboard. The cardioid rejection zone will face the keyboard instead of the capsule.
Our Top Recommendation
Based on our research, the PodMic USB is our top pick — podcasters who want broadcast-quality sound with usb-c convenience, especially in untreated rooms..
Get Mic Picks Delivered
One email per week. Honest reviews, zero spam.
Only when something changes. Unsubscribe anytime.