How to Set Up Your First Podcast Studio
Start Recording This Week, Not Next Month
The biggest obstacle to launching a podcast is not equipment — it is the research spiral. Creators spend weeks comparing microphones, interfaces, software, and acoustic treatment before recording a single word. This guide cuts through that spiral with a clear, prioritized equipment list and a step-by-step setup workflow.
Here is the thing: your first 10 episodes will not be your best. They will teach you what actually matters in your specific recording situation — which is information no buying guide can provide. The fastest path to a good-sounding podcast is starting with reasonable equipment and improving based on real experience.
We reviewed equipment choices across every podcast-focused microphone in our catalog and distilled the setup process into five priority levels. Address them in order. Stop whenever the audio quality meets your standards.
Priority 1: Choosing Your Podcast Microphone
Dynamic microphones dominate podcasting because most home studios lack acoustic treatment. A dynamic capsule rejects the background noise that condensers would faithfully reproduce — keyboard clicks, HVAC hum, room echo, traffic outside the window. Our dynamic vs condenser comparison guide covers the physics in detail.
For solo podcasters, a USB dynamic mic is the optimal starting point. One cable, one mic, recording within minutes of unboxing.
Dynamic with USB + XLR. Complete accessory kit included. The universal first podcast mic recommendation — dual connectivity means you never outgrow it.
Broadcast-quality dynamic with internal pop filter and shock mount. USB-C + XLR. APHEX DSP on USB mode. Built for daily podcasting — the internal accessories save you from buying them separately.
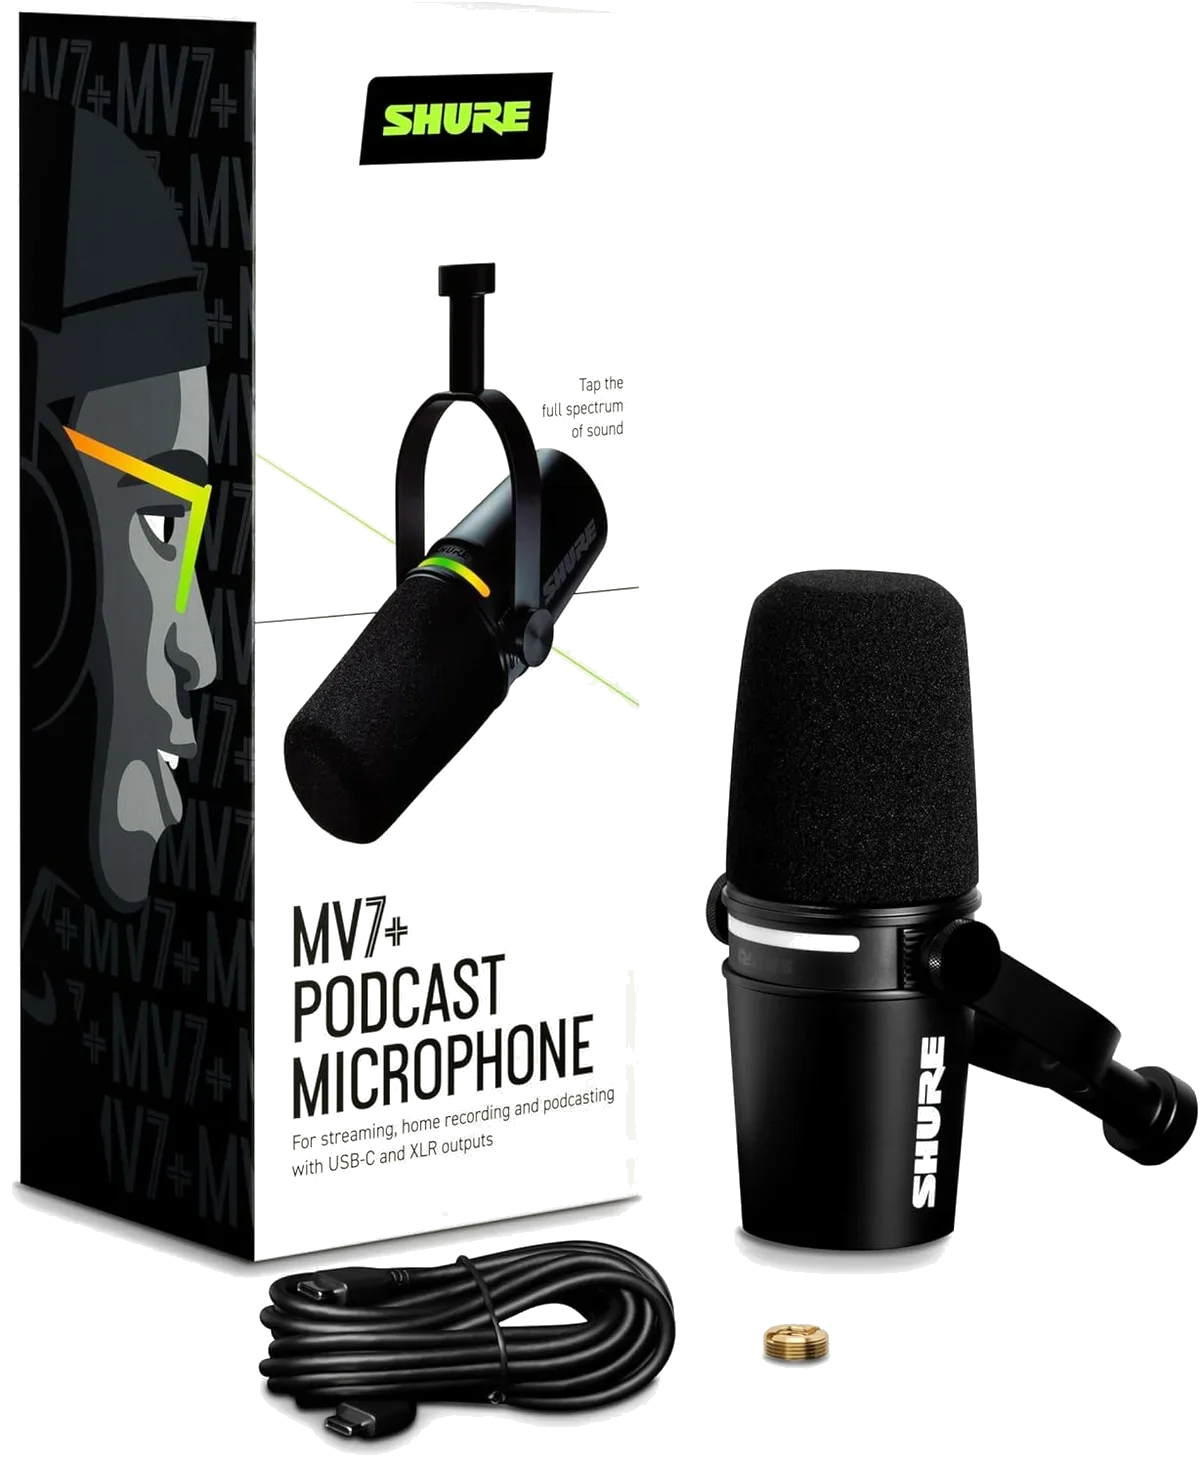
Premium dynamic with Auto Level Mode and digital pop filter. USB-C + XLR. Broadcast build quality and Shure engineering — a lifetime purchase for committed podcasters.
Priority 2: Mic Technique That Costs Nothing
This step is free and produces more improvement than any accessory purchase.
The single most impactful adjustment. Closer = more voice signal relative to room noise. The proximity effect in dynamic mics adds warmth and body at close range. Pull back to 12+ inches and the audio thins out, the noise floor rises, and you lose the intimate podcast sound that listeners expect.
Cardioid mics (which includes every dynamic in our catalog) pick up most strongly from the front. Speaking from the side or above reduces your voice volume while background noise stays the same. Look at your mic — the front is usually the side with the brand logo, status LED, or grille opening.
Record a test at your natural speaking volume. Turn gain up until the loudest peaks just touch the yellow zone in your recording software. Then back off slightly. Too low = noise floor becomes audible. Too high = distortion on emphasis and laughter. The Elgato Wave:3 streaming condenser with Clipguard handles this automatically — but every other mic needs manual gain staging.
Priority 3: Room Treatment for Under $50
Professional acoustic treatment involves panels, bass traps, and diffusers. You do not need any of that to start. Three cheap fixes handle 70% of the room echo problem that ruins home podcast recordings.
Priority 4: The Boom Arm and Pop Filter
Every included desktop tripod in our catalog has the same problem: it sits on your desk, which means it transmits keyboard vibrations, mouse clicks, and desk bumps directly into the recording. A boom arm clamps to the edge of your desk and suspends the mic in the air, isolating it from surface vibrations.
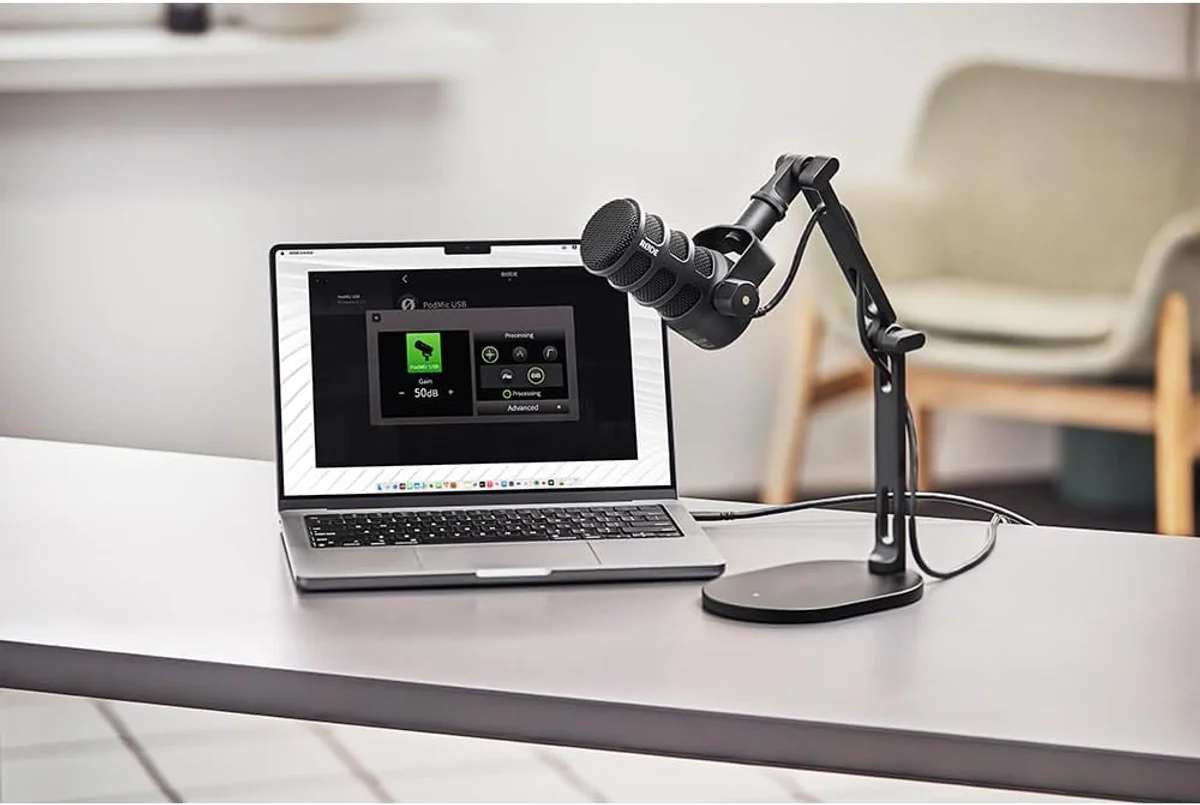
A pop filter sits between your mouth and the mic to catch plosive air blasts — the "P" and "B" sounds that create a loud thump in recordings. Some mics have built-in pop filters — the Rode PodMic USB broadcast podcasting dynamic has an internal one, and the HyperX QuadCast S four-pattern gaming condenser has a built-in mesh filter. For mics without internal filters, a simple pop filter solves the problem for a small investment.
Priority 5: Moving to XLR (When You Need It)
Most solo podcasters never need XLR. You need it when:
- You record with a co-host or guest in the same room (two mics, two separate tracks)
- You want to add hardware processing — a compressor, an external preamp, analog EQ
- You are building a dedicated studio space and want component-level upgrade flexibility
If any of those apply, read our USB vs XLR connectivity guide for the full breakdown. The short version: buy a 2-input audio interface (Focusrite Scarlett 2i2 is the standard recommendation), two XLR mics, and two Cable Matters premium braided XLR cables. Our complete XLR connector guide covers cable quality and why braided shielding matters.
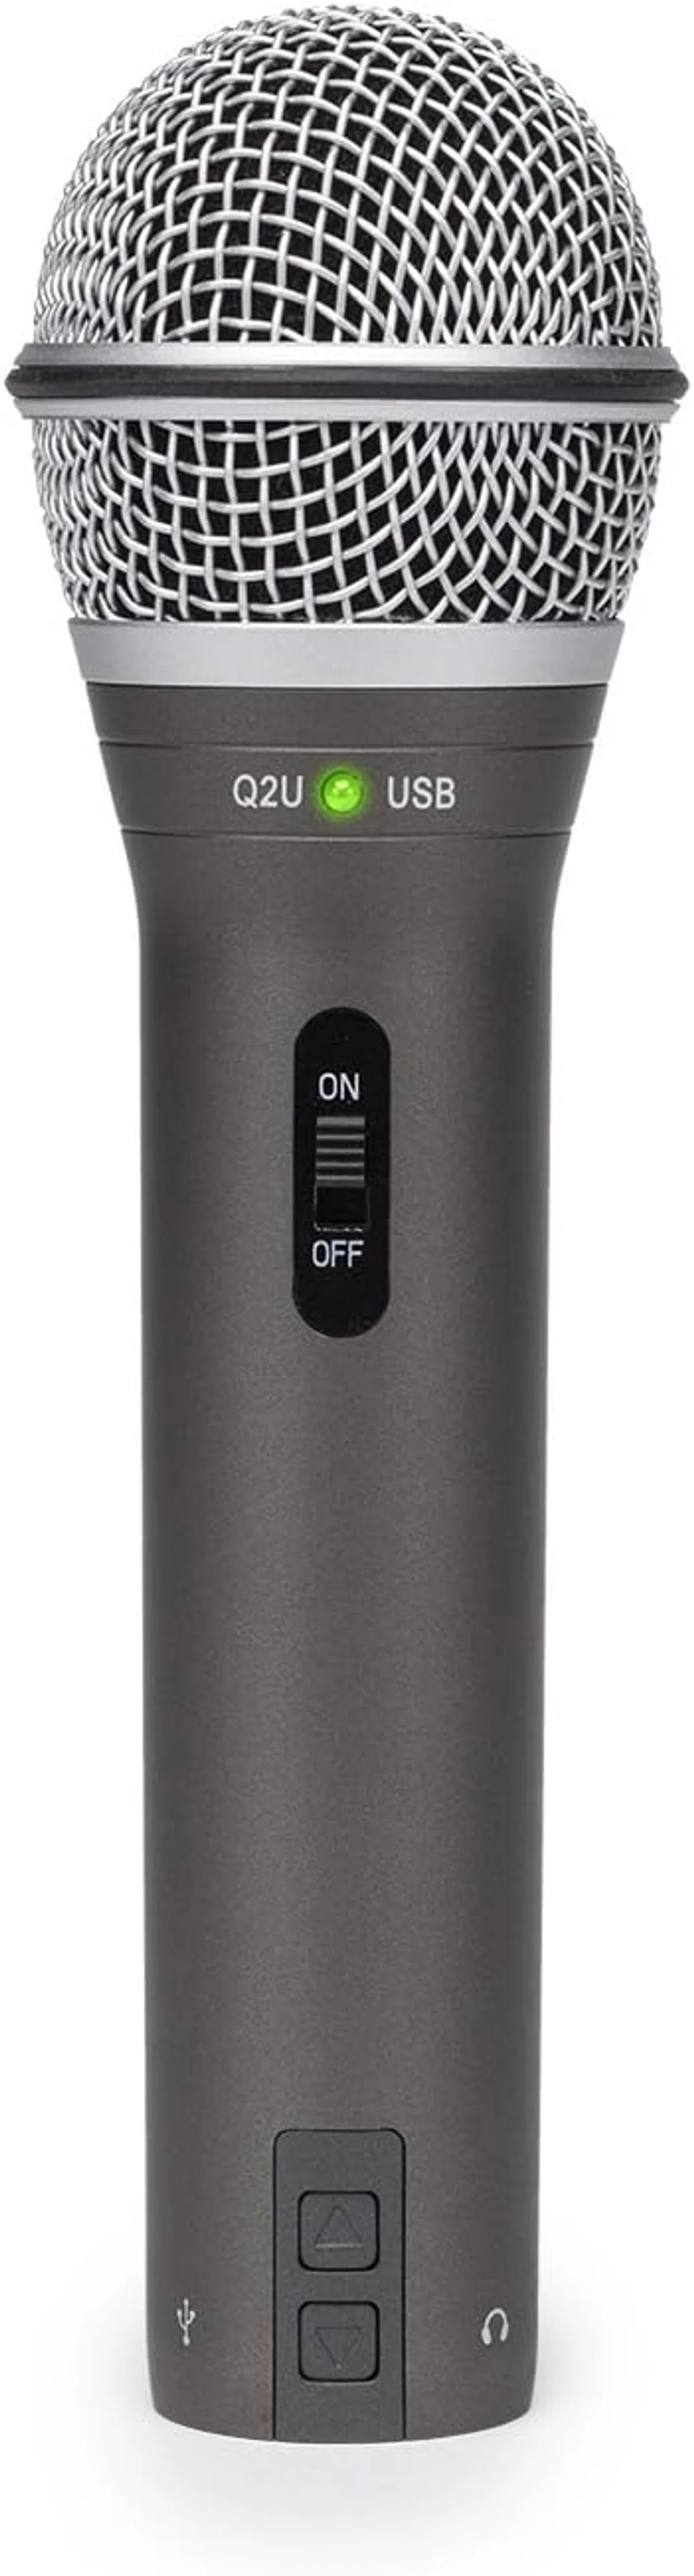
Look, if you started with a USB/XLR hybrid mic like the Samson Q2U dual-output recording dynamic or the Shure MV7+ premium broadcast microphone, the transition is painless — plug the XLR cable into your interface and your existing mic works on the new system. No new mic purchase required.
Recording Software: Free Is Good Enough
Software is the least important variable in podcast audio quality. Free tools produce identical audio to paid tools — the recording quality depends on the mic, the room, and the technique, not the recording app.
Open source, Windows/Mac/Linux. Records, edits, exports. The interface is dated but the recording engine is clean. Most podcasters never outgrow it.
Mac only. More intuitive than Audacity with podcast-friendly presets. Records multi-track if you add a second mic later.
Built specifically for spoken-word content. Automatic loudness leveling, voice profiling, and publishing tools. Worth the investment once your podcast has an audience — not before.
The Complete Starter Kit Checklist
Everything you need, nothing you do not, in priority order. Start with the first two items and add the rest as your podcast grows.
Samson Q2U (budget), Rode PodMic USB (mid), or Shure MV7+ (premium). All three are dual USB/XLR for future flexibility.
Audacity (any OS) or GarageBand (Mac). Download and test before your mic arrives.
Any arm with a standard 5/8" thread mount. Eliminates desk vibrations and positions the mic at mouth level.
Blanket behind monitor + rug on hard floor + curtains. Under a small investment for measurable improvement.
Skip if your mic has a built-in filter (Rode PodMic USB, HyperX QuadCast S). Buy if using Blue Yeti USB, Samson Q2U dynamic, or FIFINE.
For monitoring your recording in real time. Any closed-back headphones work. Open-back headphones leak sound into the mic.
The equipment list above covers everything. Do not buy what you do not need yet. The TONOR TC30 complete beginner mic bundle and FIFINE AmpliGame budget dynamic starter mic are tempting at their price tiers, but both have limitations that make them better for casual use than committed podcasting. Our complete microphone buying guide covers the full product matrix if you want to compare all options side by side.
Common First-Studio Mistakes
We see the same patterns in negative reviews from podcasters who bought the wrong setup. Three mistakes account for most of the disappointment.
Mistake one: buying a condenser mic without room treatment. The Blue Yeti multi-pattern USB condenser is a capable mic, but 40% of its negative reviews come from podcasters recording in untreated bedrooms. The four polar patterns are wasted when every pattern picks up the same room echo. A dynamic mic at half the price would have produced cleaner results in the same room.
Mistake two: spending on the mic and ignoring positioning. A Samson Q2U budget dynamic recording mic at 4 inches from your mouth on a boom arm sounds better than a Shure MV7+ premium broadcast dynamic at 18 inches on the included desk stand. Distance from the mic is the most undervalued variable in podcast audio. Close mic technique is free and produces the largest quality improvement after the mic purchase itself.
Mistake three: buying accessories before recording a single episode. Pop filters, shock mounts, acoustic panels — all useful, none required for episode one. Record five episodes with the bare minimum. You will learn which problems actually affect your specific recordings, and you can buy targeted solutions instead of guessing.
When to Upgrade
Upgrade when you can identify a specific audio problem that equipment solves. "My recordings sound echoey" → add room treatment. "My desk vibrations come through" → buy a boom arm. "Guests sound quiet while the host is loud" → switch to XLR with a 2-input interface for separate gain control.
Do not upgrade because a forum post said your mic is "entry level." The Samson Q2U dual-output dynamic has been the starter podcast mic recommendation for years because it works — not because it is cheap. Creators who upgrade to the Rode PodMic USB broadcast podcasting dynamic or Shure MV7+ premium podcast microphone typically do so after 50+ episodes, when they have a clear understanding of what their specific setup lacks.
The HyperX QuadCast S four-pattern gaming condenser and Elgato Wave:3 streaming condenser with Clipguard serve different workflows — streaming and gaming — where software integration matters more than raw audio quality. For pure podcast use, dynamic mics remain the better choice in untreated rooms.
Record episode one this week. Your audience will not hear your room treatment — they will hear your content. The best podcast equipment is the equipment you already own and actually use.
If you need wireless audio for remote interviews or on-location recording, our wireless microphone buying guide covers the full range of options from budget lavaliers to professional dual-channel systems — a different setup entirely from the desk-based studio covered in this guide. For wireless-first creators who shoot video while walking or standing, check our wireless microphone roundup for the current top picks.
Our Top Pick for First Podcast Studios
Compare Top Podcast Mics
Frequently Asked Questions
What is the bare minimum needed to start a podcast?
A USB microphone and a computer with free recording software like Audacity or GarageBand. That is two things. Everything else — boom arms, pop filters, acoustic treatment, audio interfaces — improves quality but is not required for episode one. The Samson Q2U complete kit includes a desktop stand, windscreen, and both USB and XLR cables for under the mid-range tier.
Should a new podcaster buy USB or XLR?
USB. Solo podcasters recording one voice do not need the multi-input capability that XLR provides. USB eliminates the audio interface purchase, the cable purchase, and the gain staging learning curve. When your show grows to include guests in the same room, switch to XLR through the same mic if it supports both. Our USB vs XLR guide covers the full comparison.
How much does a home podcast studio cost?
A functional setup starts at the budget tier for a mic and a free recording app. A mid-range setup with a quality dynamic mic, boom arm, and basic room treatment runs between the mid-range and premium tiers. Professional-grade setups with XLR mics, dedicated interfaces, and full acoustic treatment can exceed the premium tier. The biggest quality jump per dollar happens between budget and mid-range — after that, returns diminish fast.
Do podcasters need acoustic treatment?
Dynamic mic users in small rooms: often not. Condenser mic users: almost always yes. The simplest treatment that makes a measurable difference — a thick blanket behind your monitor, a rug on hard floors, curtains over windows — costs under $50 and takes 10 minutes. Full panel treatment runs higher but matters most for condenser mics in large, reflective rooms.
Is a boom arm necessary?
Not necessary, but the single highest-impact accessory upgrade. Boom arms position the mic at mouth level without taking desk space, isolate the mic from desk vibrations, and let you swing the mic away when not recording. Every included desktop tripod in our catalog transmits keyboard vibrations into the recording. A boom arm solves this for a modest investment.
Can a podcast sound professional on a budget mic?
Yes. Mic technique matters more than mic price above the entry tier. Position a budget dynamic 4-6 inches from your mouth, speak directly into the front of the capsule, and record in the quietest room available. That recording will sound better than a premium condenser used at arm's length in an untreated room.
Our Top Recommendation
Based on our research, the Samson Q2U is our top pick — first-time podcasters and content creators who need a reliable mic with both usb convenience and xlr upgrade potential at a budget price..
Get Our Top 3 Picks
Get our top 3 picks for your budget — one email, then only updates.
Only when something changes. Unsubscribe anytime.